How to Create a Clickable Table of Contents in Microsoft Word for Self-Publishing Your eBook
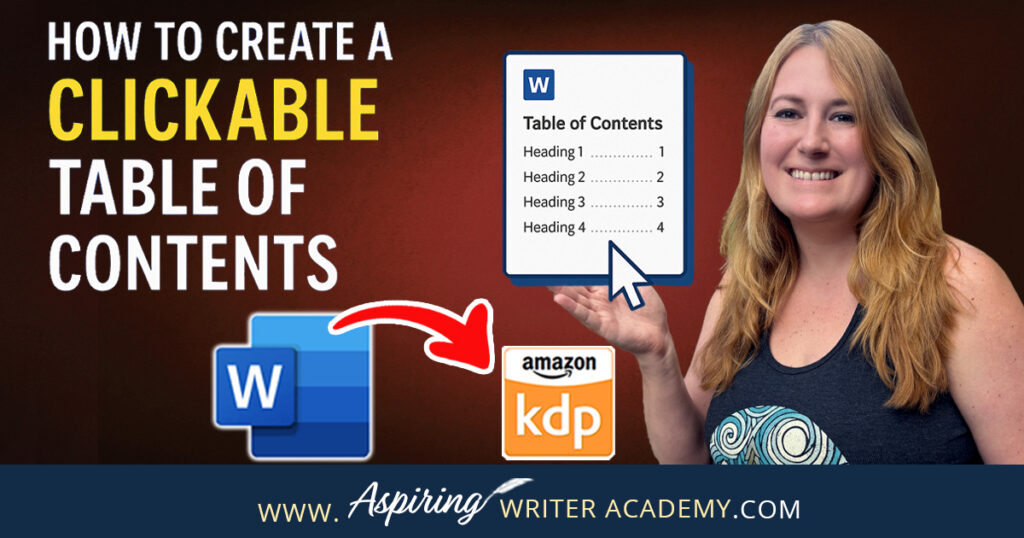
If you’re self-publishing your eBook on Amazon KDP (or another platform), a clickable Table of Contents (TOC) is a must. Not only does it make your book look polished and professional, but it also makes it easier for readers to navigate—especially on Kindle devices, where a TOC can make or break the user experience.

The good news? Microsoft Word makes it super easy to build one. No tech skills required—just a few clicks!

 Step-by-Step: How to Create a Clickable TOC in Word
 Step 1: Use Heading Styles for Your Chapter Titles
Before Microsoft Word can generate a Table of Contents, it needs to know which parts of your text to include—and that’s where Heading Styles come in. Once you've marked your chapter titles with heading styles, you can take things a step further by customizing the appearance of your TOC. This ensures it not only functions properly but also blends beautifully with the rest of your ebook’s design for a clean, consistent, and professional finish.
 Ready to get started? Here’s how to create a custom TOC style in Word:
1. Highlight Your Chapter Title
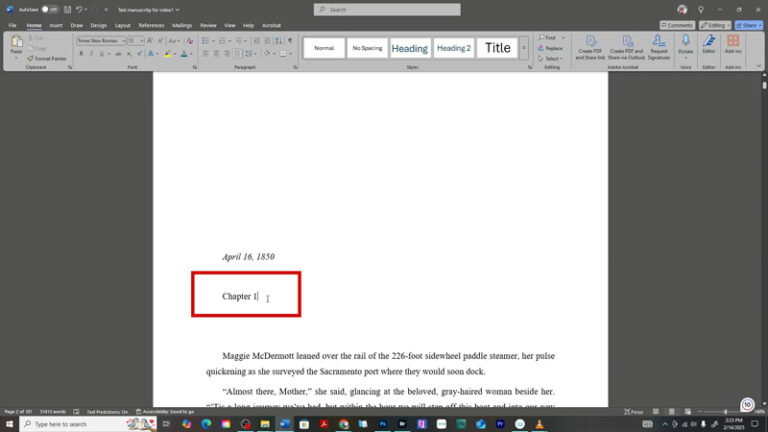
To begin, click and drag to highlight a chapter title in your manuscript—like Chapter 1. This is the text you'll be applying a heading style to so Word knows to include it in the clickable Table of Contents later.
2. Open the Styles Panel
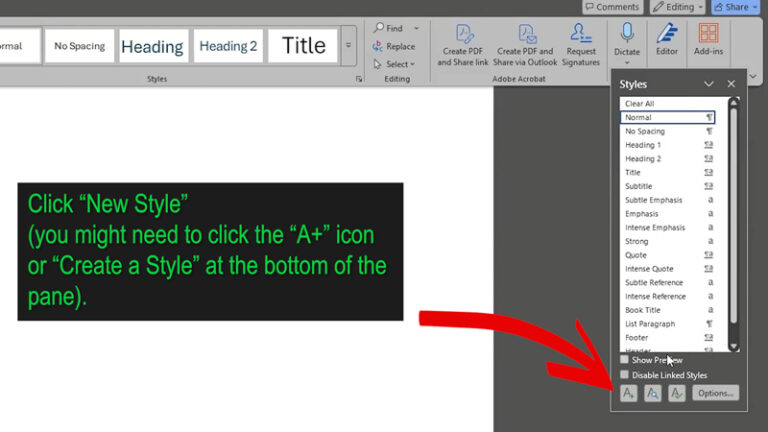
Head to the Home tab, then click the small diagonal arrow in the bottom-right corner of the Styles group to open the full Styles panel.

3. Create a New Style
In the Styles panel, click New Style, then click Modify to customize how your TOC will appear.
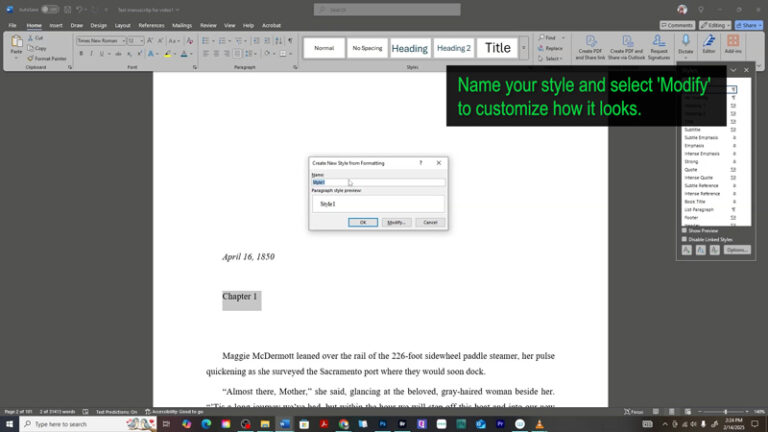
4. Name Your Style
Give your new style a name like “TOC Style” so you can easily find and apply it later.
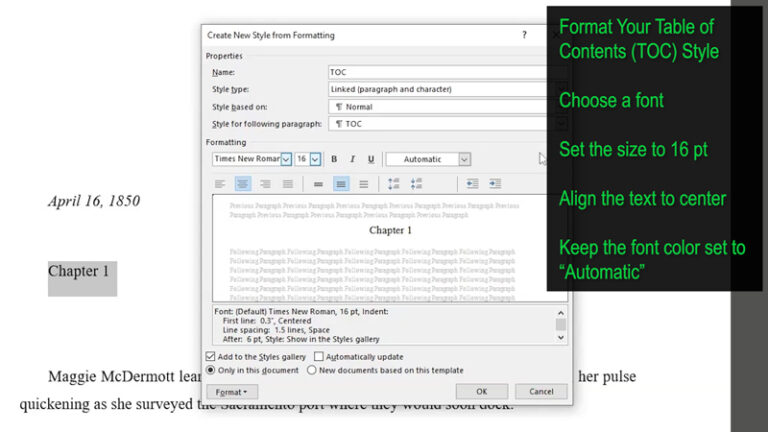
5. Format the Style to Match Your Book
In the Modify Style box:
-
Choose a font like Georgia or Times New Roman.
-
Set the font size (I recommend 16 pt for readability).
-
Click the Center Align button if you want a balanced look.
-
Keep the color set to Automatic for compatibility across devices.
6. Fine-Tune Spacing
Click Format → Paragraph, and set:
-
Spacing After: 6 pt
-
Line Spacing: Single or 1.5
-
Indentation: 0
7. Optional: Add to the Styles Gallery
Check the box for “Add to the Styles gallery” if you want easy access to your TOC style in the future.
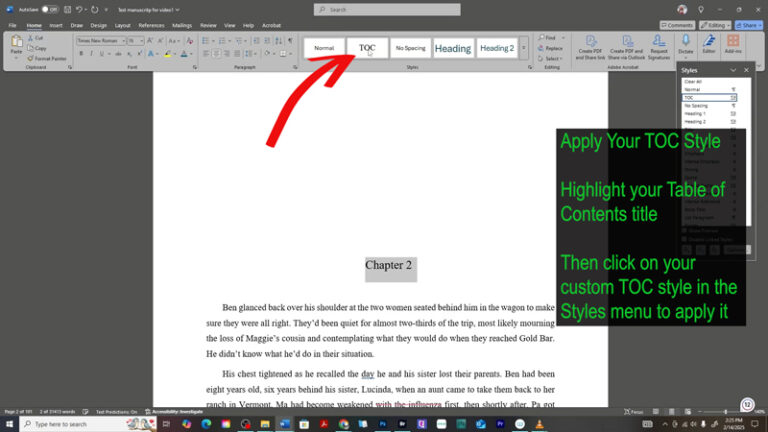
8. Apply the Style to Your TOC Entries
Now, apply your new TOC style to each chapter title in your Table of Contents. This keeps your formatting consistent and gives your readers a smooth, easy-to-navigate experience.
 Step 2: Insert a Clickable Table of Contents
Now that your headings are set up, it’s time to drop in your TOC.
-
-
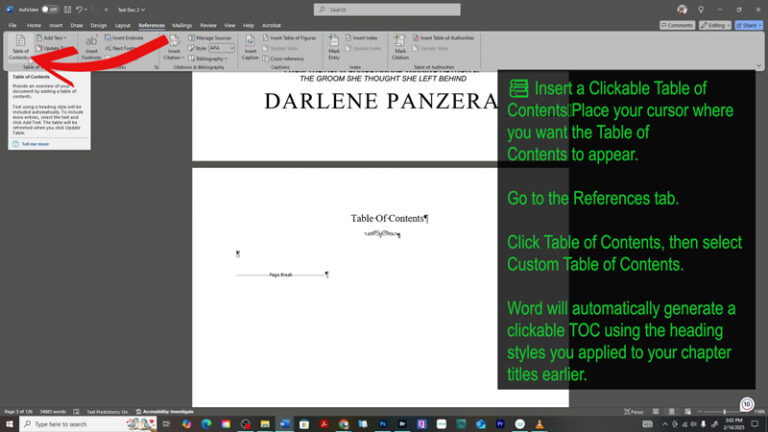
Place your cursor where you want the TOC to appear (usually after your copyright or title page).
-
Go to the References tab.
-

3. Click Table of Contents → Choose Custom Table of Contents.
This opens up a settings box where you can customize the style and structure of your TOC.
 Step 3: Customize Your TOC Settings
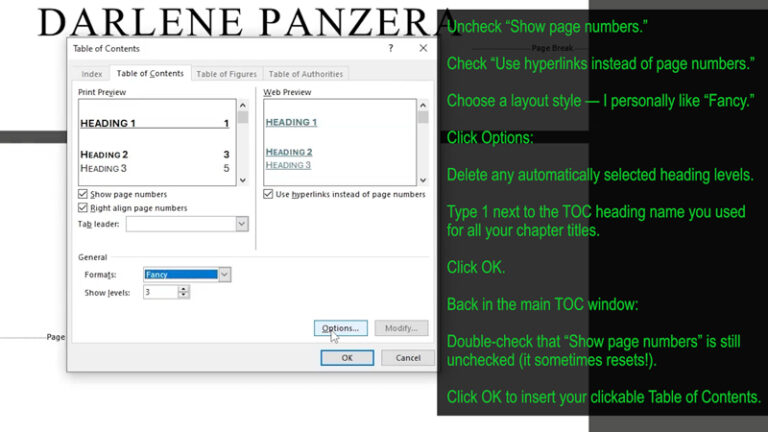
In the popup window:
-
Uncheck "Show page numbers" (optional for eBooks).
-
Check "Use hyperlinks instead of page numbers."
-
Choose a TOC format you like (I personally like Fancy—clean and elegant).
-
Click Options.
Now let’s make sure Word pulls the right headings into your TOC:
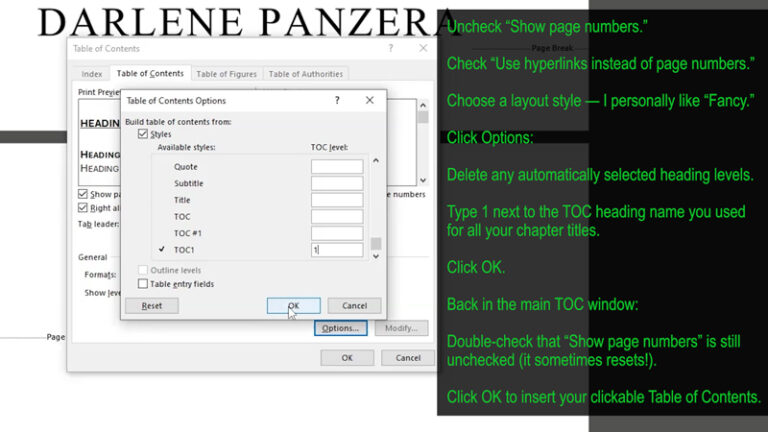
In the Options popup window, delete any numbers that are already filled in.
Then, type 1 next to the name of the style you applied to your chapter titles (for example, “TOC” or whatever custom name you used). This tells Word to use that specific style for building your Table of Contents.
Click OK to confirm.
Then back in the main Table of Contents window:
-
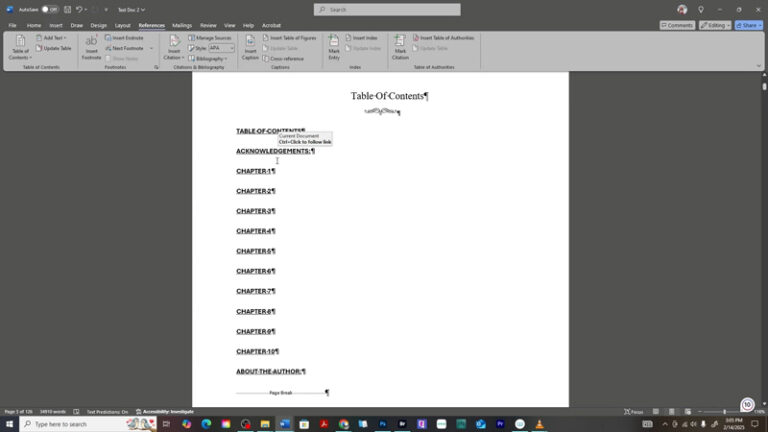
Double-check that “Show page numbers” is still unchecked (Word sometimes re-checks it).
-
Click OK to insert your clickable TOC.
Congrats! You should now have a fully functional, clickable Table of Contents.
 Step 4: Update Your TOC as You Edit
If you move or add chapters later, updating the TOC is easy:
-
Click anywhere inside the TOC box.
-
Click Update Table.
-
Choose:
-
Update page numbers only if you haven’t changed any chapter titles.
-
Update entire table if you added or deleted sections.
-
 Why a Clickable TOC Matters (Especially for eBooks)
A clickable TOC isn’t just helpful—it’s a critical part of eBook formatting. Here’s why:
-
Improves reader navigation—especially on mobile or Kindle.
-
Meets Amazon KDP standards.
-
Makes your book look professional.
-
Reduces complaints or negative reviews due to “bad formatting.”
Even if your book is short, giving readers the ability to jump between sections makes a big difference in how polished your eBook feels.
 Bonus Tip: Clean Formatting = Better Conversions
Using proper styles and formatting also ensures that your TOC looks good when converted to Kindle format. Avoid using tabs or manual spacing for indents, and always preview your book using Kindle Previewer before publishing.
 Final Thoughts
Adding a clickable Table of Contents in Microsoft Word is one of the easiest ways to upgrade your eBook’s quality. It only takes a few minutes, but it can dramatically improve the reading experience—and help you stay in line with KDP’s formatting requirements.
So if you haven’t added one yet, now’s the time!

Drop them in the comments below—I’m happy to help!

Other Posts You May Like:
Do you find it difficult to create compelling antagonists and villains for your stories? Do your villains feel cartoonish and unbelievable? Do they lack motivation or a specific game plan? Discover the secrets to crafting villains that will stick with your readers long after they finish your story, with our How to Create Antagonists & Villains Workbook.
This 32-page instructional workbook is packed with valuable fill-in-the-blank templates and practical advice to help you create memorable and effective antagonists and villains. Whether you're a seasoned writer or just starting out, this workbook will take your writing to the next level.
We Believe All Authors Can Aspire to Take Their Writing to the Next Level!
Our Goal for Aspiring Writer Academy is to help people learn how to write quality fiction, teach them to publish and promote their work, and to give them the necessary tools to pursue a writing career.
ENTER YOUR EMAIL BELOW
TO GET YOUR FREE
"Brainstorming Your Story Idea Worksheet"
7 easy fill-in-the-blank pages,
+ 2 bonus pages filled with additional story examples.
A valuable tool to develop story plots again and again.
Other Blog Posts You May Like
Scene & Sequel: The Secret to Plotting an Epic Novel
Scene & Sequel: The Secret to Plotting an Epic Novel (Part 2)
Writing Fiction: How to Develop Your Story Premise
12 Quick Tips to Write Dazzling Dialogue
10 Questions to Ask When Creating Characters for Your Story
Macro Edits: Looking at Your Story as a Whole
Basic Story Structure: How to Plot in 6 Steps
Writing Fiction: How To Keep Track of Time in Your Story
Behind the Scenes: Interview with the Authors of the “Sew in Love” Collection
Samantha Panzera is an adventurous travel blogger, graphic designer, and multi-media business entrepreneur who uses the experience she’s gained over the years to teach aspiring writers the skills they need to build an author platform and take their careers to the next level.

