Amazon KDP for Beginners: A Step-by-Step Guide to Self-Publishing


Amazon KDP (Kindle Direct Publishing) is a great platform to self-publish your book and get your novel in front of customers worldwide. However, navigating the self-publishing process on KDP can often be overwhelming for beginners.
We wrote this article Amazon KDP for Beginners: A Step-by-Step Guide to Self-Publishing to help walk authors through the process of setting up their book details page, adding their book content, book description, uploading manuscripts and book covers, and setting up their pricing and royalties.
We hope that this overview of the publishing process through the Amazon KDP Dashboard will help de-stress self-publishing your book.
1. Create Your Amazon KDP (Amazon Kindle Direct Publishing) Account
Step 1 is to create your Kindle Direct Publishing Account (KDP).
To get started visit https://kdp.amazon.com/ and select the yellow Sign Up button on the right-hand side of the screen.
After clicking Sign Up you can enter your personal information. You will be prompted to enter your name, email, and password and then you can click create your KDP account.
After creating your KDP account you can enter your social security number and fill out a form with tax information, banking information on where you will want your royalty payments sent, and other necessary behind-the-scenes necessary account details.
You will also have to accept Amazon KDP's Terms of use.
 Account")
2. Click the Big Yellow + Create Button
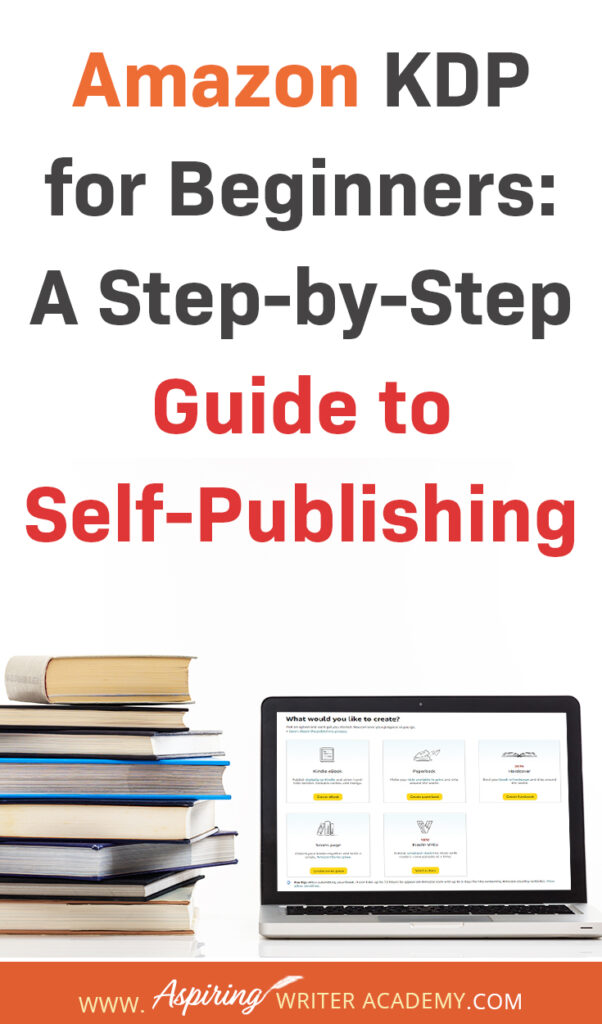
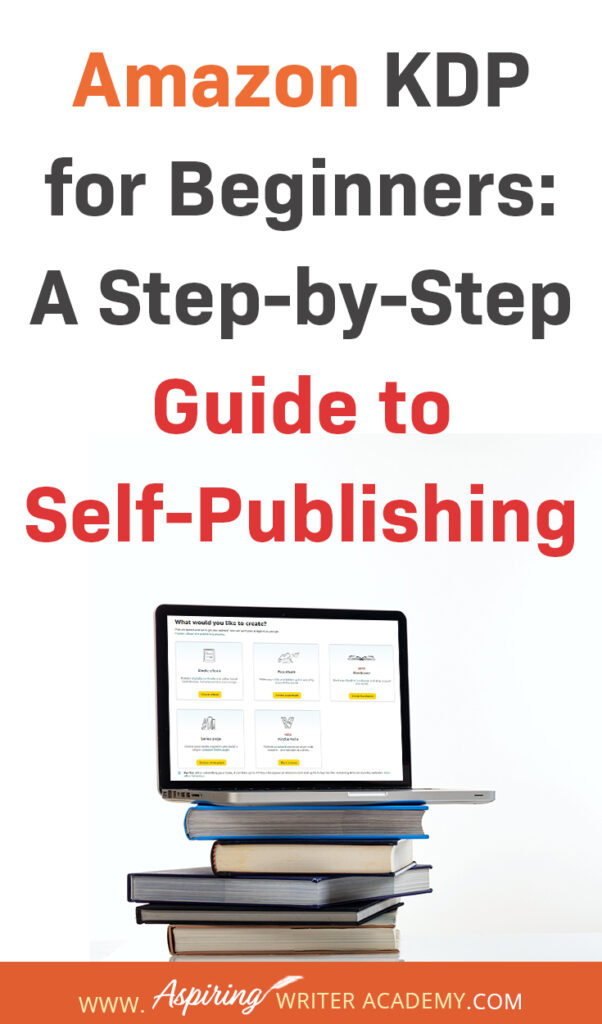
To start the process of self-publishing your book on amazon you're going to want to click on the big yellow +Create Button. This will bring you to a screen where you can select what you would like to create.

3. Select What You Would Like To Create
On this page, you can select what sort of product you wish to create. Do you want to create a Kindle eBook? A paperback book? A hardcover print book? A Series Page for your book series? Or a Kindle Vella? You will have to create each version of your book separately.
If you wish to create a Kindle eBook you will need to go through the process of creating an eBook. To create a paperback or hardcover you will have to go through the individual publishing process of creating each one. You can later link the books together but each version needs to be its own product.

4. Select the Primary Language of Your Book
After selecting either Kindle, paperback, or hardcover, you will be brought to your book details page. At the top of the page, you will need to select the language in which your book is written.

5. Enter Your Book's Main Title and Subtitle
Next up on your book details page, you need to enter your book title. You can enter your book's main title and subtitle of your book. This is one of the most important steps. Book titles are a huge part of how people can find you in the Amazon Marketplace. After your book cover, your book's title has to catch a potential reader's attention and get them to click on your book's details page. If you would like to learn more about brainstorming book titles check out our blog post: The Ultimate Guide to Using ChatGPT for Book Title Inspiration.

6. If Your Book Is Part of A Series, Add Series Details
If the book that you are publishing is book 1 of a series or an additional book to a series, this is where you can enter the number of which book in the series it is. If your book is not part of a series you can skip this step.

7. Update Edition Number If Your Book Is A New Edition Of An Existing Book
If you had this book previously published and you are just now getting the rights back allowing you to self-publish, or if you had your book previously published in a collection, or anthology, you can set your book as a second edition. Or if in the future after publishing this book, you wish to make significant changes to the story that are more comprehensive than just updating a few commas and misspellings, you can update this section to a second or third edition.

8. Enter the Name or Pen Name of the Primary Author
Here you can enter your name or the pen name that you want your audience to see. This is what people will see in the Amazon Market Place when looking for the author.

9. Contributors. (If You Have Other Authors, Editors, Illustrators, Or People Involved, Add Them Here.)
Are there any other contributors who helped you with your book? This is where you can list them. If you are a children's book author you can list your illustrator here. If someone helped co-write the book with you, you can list their name as an additional author. If this book is an anthology with a collection of stories written by multiple authors, you can list all the other authors here. You can also give credit to editors, photographers, and other people that may be involved with the creation of your book.
")
10. Add Your Book Description
This is where you can enter the description of your book. This is a highly critical step in marketing your books. This is one of the key elements that play a part in the decision-making process of whether a customer will decide to purchase your book or not. If you would like to learn how to craft a great book description or back cover blurb for your book you may want to check out our blog post: Fiction Writing: How to Write a Back Cover Blurb that Sells.

11. Select Your Publishing Rights
Select your publishing rights. Most writers will select the top button I Own the Copyright and Hold Necessary Publishing Rights. The second option, This is a Public Domain Work, is used when your book contains material from the public domain which is not covered by copyrights, usually because the rights have expired. Often books become public domain 70 years after an author's death except for some exceptions where the rights are passed to someone else. You would use this option if your book is a twist on an older classic story. But the majority of authors write their own books and will want to select the top button I Own the Copyright and Hold Necessary Publishing Rights.

12. Enter Your Keywords
The critical keywords section. This is a topic that authors are constantly discussing at writers' conferences or whenever you get a group of writers together. Keywords, Keywords, Keywords. The keywords play a huge part in how people can find your book on Amazon. Do your research and choose your keywords wisely. You can select up to 7 keywords to help your audience find your book. You want to make sure these keywords are something a potential reader might type when looking to find a book like yours.

13. Choose Your Book's Categories
Book categories are another highly important part of the metadata of your book. Picking your category plays a huge part in how people can find your book on Amazon. Look up other books similar to yours to help you find categories that fit. You can only select two. When clicking Choose Categories a popup box will appear. You can click on the "+" buttons to navigate to the category that best describes your book.
Categories also play a massive role in what books your book will be competing against to become a bestseller. Some categories are more competitive than others so narrowing in on a smaller niche can sometimes help your book get noticed in the huge sea of books on Amazon.

14. Does Your Book Contain Adult Content? Select Yes or No
Pretty self-explanatory, here you check Yes or No to answer the question: does your content include anything inappropriate for children under age 18?

15. Choose Between Amazon's Free KDP ISBN or Enter Your Own Universal ISBN.
Select whether you wish Amazon to assign you a free KDP ISBN number or if you will use your own purchased ISBN. If you do not know the difference between the free Amazon ISBN number and universal ISBN numbers, we recommend checking out our blog post: What Authors Need to Know About ISBN Numbers Before Self-Publishing. Our blog post covers what authors need to know about ISBNs, how they are used, how much they cost, and where you can purchase one for your books.


16. Publication Date
This is the spot where authors can choose when they wish for their book to be released. Many authors choose a release date far in advance so they can market their book and gain pre-orders for their Kindle or print book to help boost them in the rankings. If you would like to learn more about things authors should or shouldn't do when self-publishing you may wish to check out our blog post: Biggest Self-Publishing Mistakes New Authors Make.
It is a good idea to set your publishing date 3-6 months in advance so you have time to build up a marketing plan for your book and work on your Author Platform and grow your email newsletter.

17. Print Options
Print Options is the section where you can select the type of interior you want for your print book. There are several options to choose from and different versions work better for different kinds of books.
For example: if you are publishing a classic fiction novel, you may prefer a black-and-white interior with cream paper. But if you are publishing a coloring book or workbook, you may want a black-and-white interior with white paper. If you have some photos in your book, you may wish to use standard color interior with white paper. Then if you are publishing a children's book or photography book, you most likely would want premium color interior with white paper.

Trim Size
In the Print Options section is trim size. This is where you select the size of your book. In most cases, you will want to stick to the most popular and standard trim sizes. Do some research on which trim size would be best for the book that you want to publish.
Novels are often: 5x8, 5.25x8, 5.5x8.5, and 6x9.
Workbooks are often: 8.5x11.
Picture books are often: 8.5x8.5.


Bleed
Bleed is something that you do not need to worry about if your book does not contain pictures or color that goes to the edge of the page. Bleed is primarily for picture books or books with full images. If your novel is mostly text-based, most likely you will select 'no bleed.' If you are publishing a picture book or any book with full-color images you will want to select 'bleed' but only if the images go to the full edge of the page. If no images are going to the edge of the page do not select 'bleed'.
According to Amazon:
When a book is printed, all pages are trimmed to the selected trim size by cutting 0.125” (3.2 mm) from the top, bottom, and outside edges. In order for objects on your page to reach all the way to the edge of the page, those objects must extend past where the page will be trimmed by 0.125” (3.2 mm). This means you need to increase your page size beyond where it will be trimmed.

Matte or Glossy Finish
Matte or Glossy Finish is entirely up to your personal preference. Think about your book cover and what you believe will look best. Matte finish or Glossy Finish? This selection is just for print books.

18. Upload Your Manuscript
If you have your manuscript professionally formatted and ready to go, just click the 'upload manuscript' button. If you are not very tech-savvy, we recommend hiring someone to format your book for Kindle and print.
Many authors make the mistake of just uploading their Word document or their own PDF, and the formatting looks wonky and unprofessional and can leave a bad impression on readers.
Here is a link to Amazon's Book Formatting page: Click Here. You do not want to just upload a Word document. You want to make sure that your manuscript is popularly formatted to the correct Kindle or print book formats.

19. Upload Your Book Cover
Upload your book cover. You want to make sure that you have your cover properly formatted for your ebook or print book. We do not recommend using Amazon's Cover Creator. It is best to upload a book cover designed outside of the Amazon dashboard. The first impression of a book matters. A poorly designed cover is a major turn-off to readers. Your story could be amazing but if you have an ugly, boring, or poorly designed cover, no one will read it.
Unless you are a professional graphic designer, we recommend that you do not design your own book cover.
Book covers are critical to getting book sales and having a bad book cover will significantly reduce book sales. If you would like to read more about book covers check out our blog post: Biggest Self-Publishing Mistakes New Authors Make

20. Preview Your Book
Now that you have uploaded your manuscript and book cover, you can preview your book using the Book Previewer. Just click the yellow Launch Previewer button. You want to look carefully through the pages. If everything looks good, hit the Approve button and click Exit The Previewer.

21. Review Summery, Save and Continue
If you are publishing a paperback or hardcover book, after uploading your book cover and manuscript, you should see a summary of your book with your printing cost. This is the base cost that it takes to print each book on Amazon. You will also see a summary with your page count, trim size, cover finish, bleed settings, and ink and paper type. If that all looks good to you, click Save and Continue.

22. Territories
This is where you can select if you want your book sold worldwide or only in individual territories. Generally, you would want to select All Territories (Worldwide rights) and sell your book worldwide, unless you have a good reason not to sell in other countries. The more places you sell your book the more chances of getting more sales.

23. Select Primary Marketplace
Even if you selected worldwide territories in the previous setting, you still need to set the primary marketplace where your book will be sold. Do not worry, your book will still be available in these other countries' marketplaces, this is just setting up your home base.

24. Select Pricing, Royalties, and Distribution
Many authors will choose the 60% royalty distribution, but for authors who want their book to go to expanded distribution, such as libraries, universities, and other booksellers outside of Amazon, the royalty rate is 40%. The choice is entirely up to each author but for most, it is better to choose the 60% royalty cut option.
When choosing a price to sell your book, look at the minimum price below the Amazon box. In the example photo below, Amazon has listed that the minimum price for my book, with me making $0 profit, would be $6.08. You can test out different prices and see how much of a royalty you would make. For example, knowing that my print book would cost a minimum of $6.08 to make if I sold it on Amazon for $7.99, I would make a royalty of $1.14. You can adjust the price and research what other books similar to yours are selling so you can price them competitively within your niche.

25. Request Proofs of Your Book
You can request proofs of your book! This option is just for people who are publishing a paperback or hardcover version of their book. Just click the Request Proof button then select how many copies you would like to purchase. Then you can pay for your proof copies from your normal Amazon account connected to your Amazon KDP dashboard.

26. Click Publish
Once you have completed all of the above steps and have double-checked everything, you can go ahead and click Publish! It sometimes can take up to 72 hours for your book to become available for purchase through Amazon. Even after hitting publish, you can always edit your listing to make it better. For example, if you want to change your keywords or update the description of your book.
We hope that our blog post, Amazon KDP for Beginners: A Step-by-Step Guide to Self-Publishing has given you insights into the KDP Dashboard and helps you with your self-publishing journey.
If you have any questions or would like to leave a comment below, we would love to hear from you!
Other Posts You May Want To Check Out Next:


Do you find it difficult to create compelling antagonists and villains for your stories? Do your villains feel cartoonish and unbelievable? Do they lack motivation or a specific game plan? Discover the secrets to crafting villains that will stick with your readers long after they finish your story, with our How to Create Antagonists & Villains Workbook.
This 32-page instructional workbook is packed with valuable fill-in-the-blank templates and practical advice to help you create memorable and effective antagonists and villains. Whether you're a seasoned writer or just starting out, this workbook will take your writing to the next level.

Our Goal for Aspiring Writer Academy is to help people learn how to write quality fiction, teach them to publish and promote their work, and to give them the necessary tools to pursue a writing career.

ENTER YOUR EMAIL
TO GET YOUR FREE
"First Steps Guide for Aspiring Writers" a 30-page comprehensive resource to get you started on your writing journey.
Other Blog Posts You May Like
Scene & Sequel: The Secret to Plotting an Epic Novel
Scene & Sequel: The Secret to Plotting an Epic Novel (Part 2)
Writing Fiction: How to Develop Your Story Premise
12 Quick Tips to Write Dazzling Dialogue
10 Questions to Ask When Creating Characters for Your Story
Macro Edits: Looking at Your Story as a Whole
Basic Story Structure: How to Plot in 6 Steps
Writing Fiction: How To Keep Track of Time in Your Story
Behind the Scenes: Interview with the Authors of the “Sew in Love” Collection
")

")

")
")


Samantha Panzera is an adventurous travel blogger, graphic designer, and multi-media business entrepreneur who uses the experience she’s gained over the years to teach aspiring writers the skills they need to build an author platform and take their careers to the next level.
Thank you for this great teaching. Please can Amazon pay my loyalty to my local bank account here in Nigeria?
Hi Matthias
Thanks for the kind words! looked into your question, and it seems non-US authors can publish on Amazon. But to get paid for your book sales, you’ll need a Payoneer account instead of direct bank transfers. You can sign up for a free account here: https://www.payoneer.com/
Also, I found this cool forum where a few other Nigerian authors were chatting about using Payoneer to get paid from their Amazon KDP accounts. Check it out: https://www.kdpcommunity.com/s/question/0D5f400000IbhJKCAZ/can-non-us-based-author-publish-on-amazon?language=fr
Hope this helps!
-Samantha
Thank you for your super article. It was the best and most understandable write up in simple steps. Keep it up well done.
I really appreciate your kind words! It’s great to hear that the article was easy to understand and useful for you. Thank you for your support, and I hope you continue to enjoy future posts. 😊